
Pet Feeder Update

published: March 15, 2021 — last modified: October 23, 2025

A short update about the progress with the sensor panel and photos of the final input panel board.

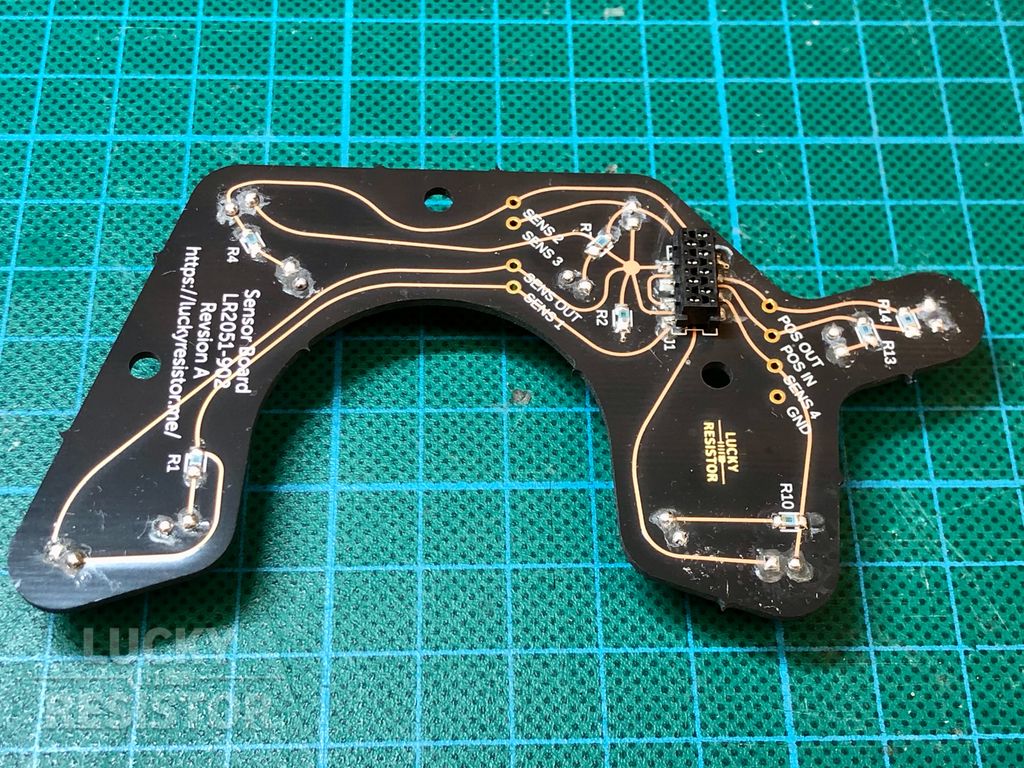
I assembled the new boards and are testing the sensors. As soon as all tests are done, and I am happy with the results and the board’s design, I will write the next part.

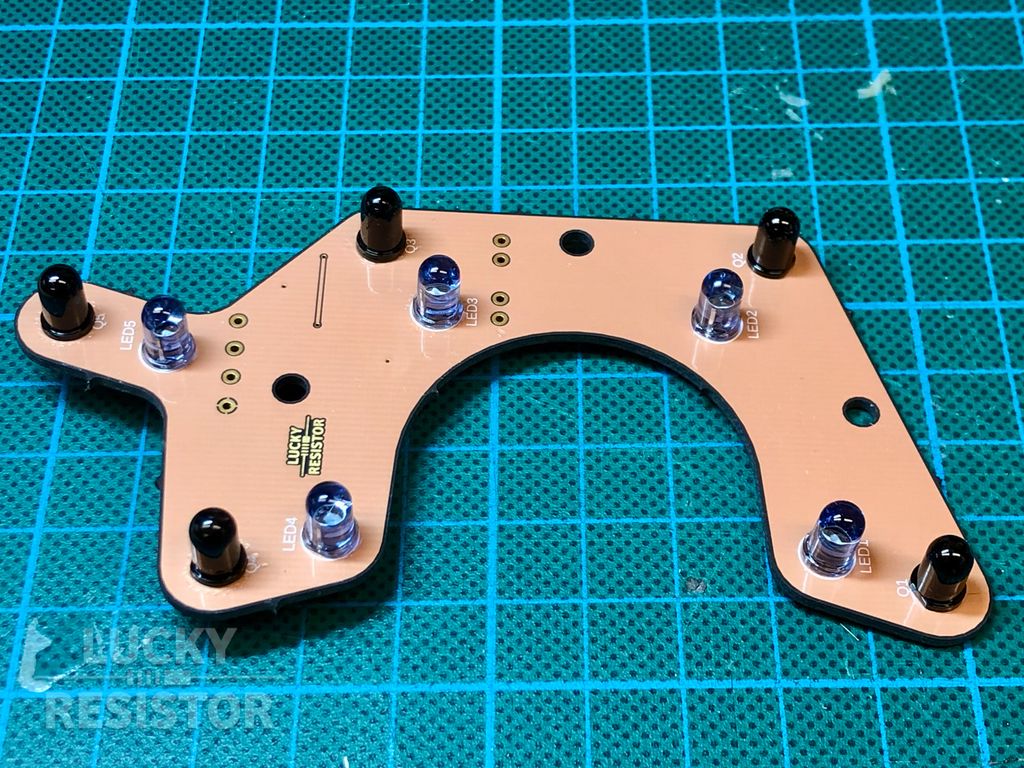
These are 940nm inferred LEDs and matching photo transistors.

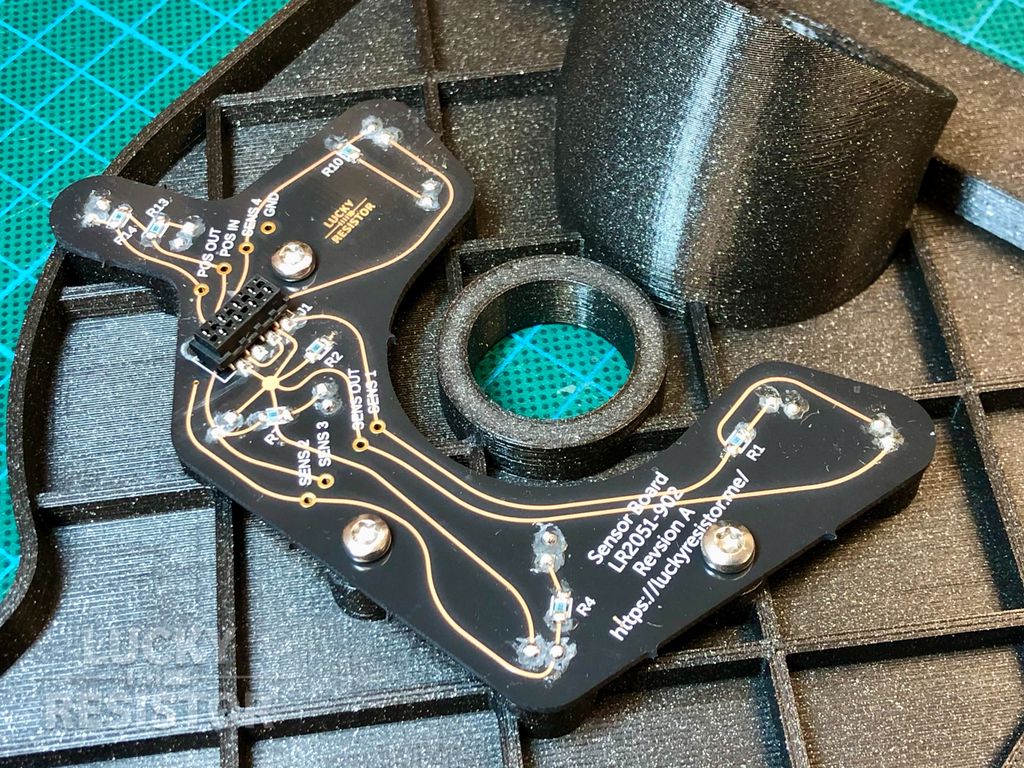
On the top side, there are just resistors and the connector.

The sensor board is fastened to the turntable platform using three m3 screws.

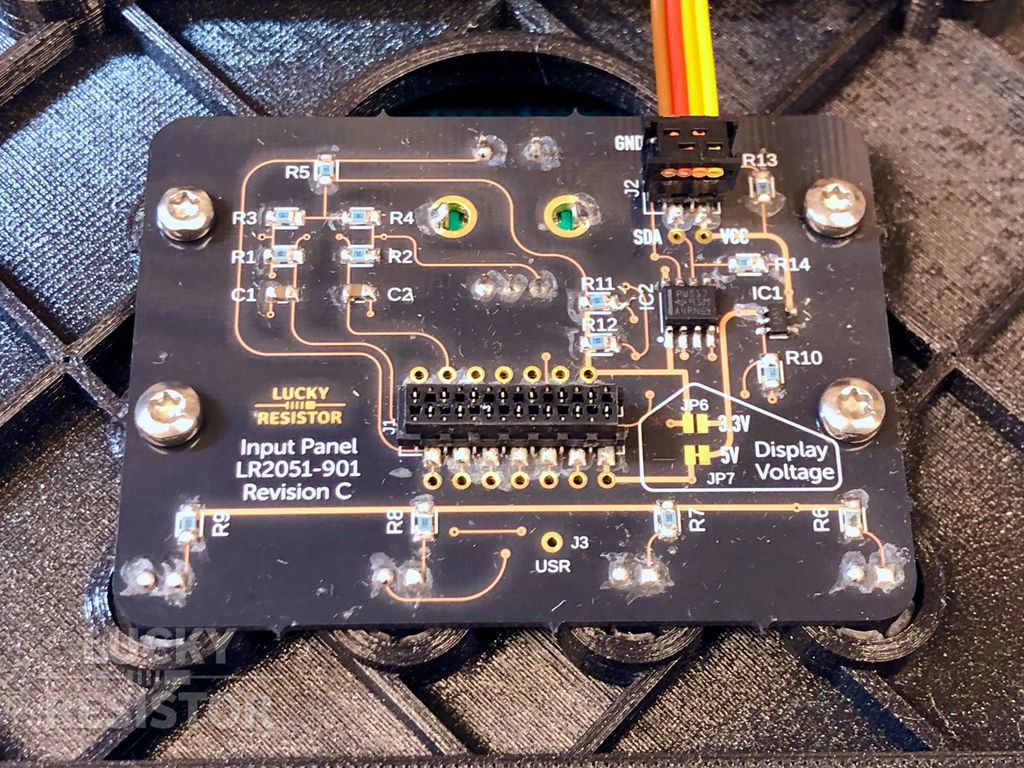
And here, revision C of the input panel board. The difference to revision D is just minor adjustments of hole sizes and label placements.

If you have any questions, missed information, or simply want to provide feedback, feel free to comment below or contact me on Twitter. 😄

More Posts

C++ Templates for Embedded Code (Part 2)

Posted on 2019-07-27— C++, Improve your Code, Learn

I continue exploring C++ templates for embedded systems, showing template classes, pin abstraction, and combining Sender and Pin examples to reduce firmware size and improve code clarity. I explain static methods, type aliases, and trade-offs between runtime flexibility and efficiency. Read the full post to see code and assembly comparisons.

Read this post

SMD Components Under the Microscope

Posted on 2016-08-11— Learn

I photographed common SMD components through a microscope to reveal how small imperfections appear up close. I cropped each image for clarity and included a 1 mm scale and captions describing the parts. If you’re curious about what resistors, capacitors and tiny ICs look like under magnification, read on.

Read this post

How to Wire the Snowflake Decoration

Posted on 2019-11-23— Projects

I walk through creating custom wiring for the snowflake decoration, covering layouts, cable choices, current and voltage-drop math, and a simple power supply board for Pimoroni kits. If you want practical tips and diagrams to wire your own design, please read the full guide.

Read this post

Decorative, Massive, Modular Box

Posted on 2021-02-27— 3D Printing, Projects

I designed a decorative, sturdy modular box built from 3D-printed parts, 5mm plywood and wood screws. The post guides you through cutting, printing, assembly and a simple part calculator to scale sizes in 60mm steps. If you enjoy hands-on projects, read the full tutorial to build and customize one.

Read this post

Electronics Invisibly Embedded in 3D Prints

Posted on 2021-01-04— 3D Printing, Fun

I experimented with embedding whole PCBs, batteries and coils inside 3D prints to seal electronics invisibly in PETG parts. I explain pausing prints to insert components, then resuming, and share pros, cons and practical tips. Read the full post if you'd like step-by-step ideas and precautions.

Read this post