"Read SHT31" Command-Line Tool

published: December 13, 2020 — last modified: October 23, 2025

For various sensors, attached to Raspberry-Pi computers, I wrote small command-line tools to read the sensor values over the I2C connection. While you can do this with a Python script directly, I found using a compiled C or C++ program accessing the low-level device more reliable.

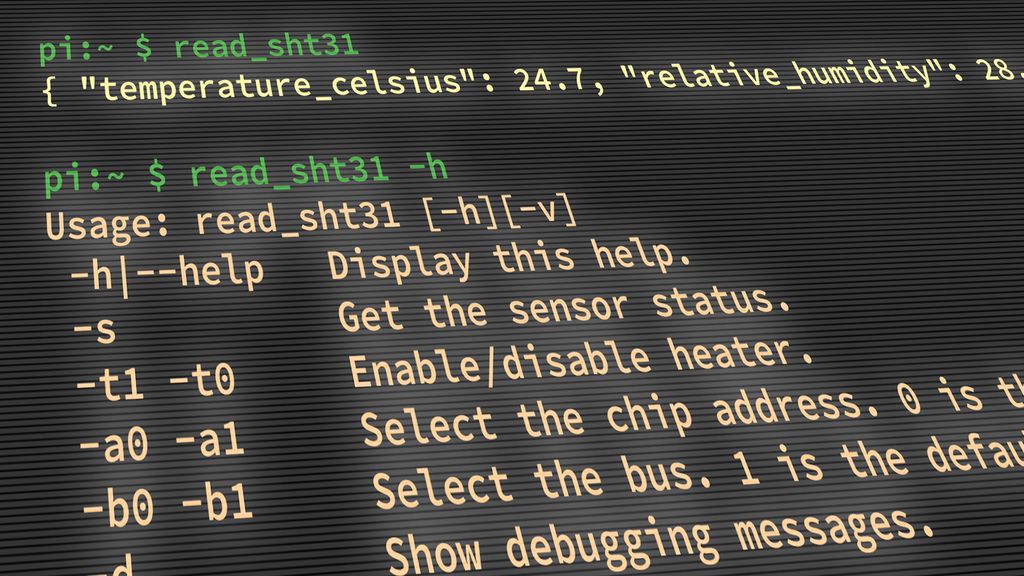
The program I publish today, reads temperature and humidity data from a SHT31 sensor. It outputs a simple JSON document you can parse in your script.

Usage

There are a number of arguments you can use:

Usage: read_sht31 [-h][-v]
 -h|--help   Display this help.
 -s          Get the sensor status.
 -t1 -t0     Enable/disable heater.
 -a0 -a1     Select the chip address. 0 is the default.
 -b0 -b1     Select the bus. 1 is the default.
 -d          Show debugging messages.

If you call the command, you will get JSON output:

$ read_sht32
{ "temperature_celsius": 24.8, "relative_humidity": 28.4 }

The idea is to call this command from your script and parse the returned JSON output.

Compile and Install

In order to compile and install the tool on your Raspberry-Pi, you need to install the compiler, CMake and the I2C-Tools first:

sudo apt install gcc cmake i2c-tools

Download the files of this git repository to a subdirectory in your home directory. In this example, I downloaded the files to the directory /home/pi/read_sht31.

Now create a separate build directory. In this example, I create the directory /home/pi/build_read_sht31.

Next switch to the build directory, execute cmake to create the build script. Build the executable with make and install the executable in your system with sudo make install.

cd build_read_sht31
cmake ../read_sht31
make
sudo make install

Download

Download or clone the files from GitHub:

License

The code is licensed under the GPL license version 3.

Available Sensors

The SHT31 sensor is available from various sources as breakout board. Here two examples:

Conclusion

Hopefully this small tool will help with your next Raspberry-Pi project. 😄

If you have any questions, missed information, or simply want to provide feedback, feel free to comment below or contact me on Twitter. 😄

More Posts

“Read SGP30” Command-Line Tool

Posted on 2020-12-19— Projects

I published a small command-line tool to read the Sensirion SGP30 air-quality sensor on a Raspberry Pi. I explain usage, options, and how to build and install the C tool so you can get JSON CO2/TVOC output. If it helps, please read the full post for details.

Read this post

Using the TDA 7052 as Amplifier

Posted on 2014-11-08— Projects

I swapped my LM386 for an NXP TDA7052 to reduce distortion and gain more volume. The TDA7052 needs only power, an input and connects to an 8Ω speaker; I added a volume trimmer (I used 47k, 10k also works). Read the full post for the schematic and wiring details.

Read this post

SMD Components Under the Microscope

Posted on 2016-08-11— Learn

I photographed common SMD components through a microscope to reveal how small imperfections appear up close. I cropped each image for clarity and included a 1 mm scale and captions describing the parts. If you’re curious about what resistors, capacitors and tiny ICs look like under magnification, read on.

Read this post

A New Modular CMake Based Toolchain for Feather M0 HAL

Posted on 2019-06-19— Projects

I built a simple, modular CMake-based toolchain for Adafruit Feather M0 boards that reuses Arduino tools while giving full build control. It’s aimed at prototype work and HAL development on macOS and Linux. If you’re curious, read the full post for setup steps and examples.

Read this post

Split Storage Boxes Update

Posted on 2021-04-10— 3D Printing, Projects

I recently updated my storage-boxes system to include split boxes so you can print larger containers or use small printer beds. I tested glued joints with PLA and PETG and added 12 new STL parts. Read the full post to see part numbers, joining tips, and where to download them.

Read this post

Decorative, Massive, Modular Box

Posted on 2021-02-27— 3D Printing, Projects

I designed a decorative, sturdy modular box built from 3D-printed parts, 5mm plywood and wood screws. The post guides you through cutting, printing, assembly and a simple part calculator to scale sizes in 60mm steps. If you enjoy hands-on projects, read the full tutorial to build and customize one.

Read this post