published: July 9, 2019 —
last modified: October 23, 2025
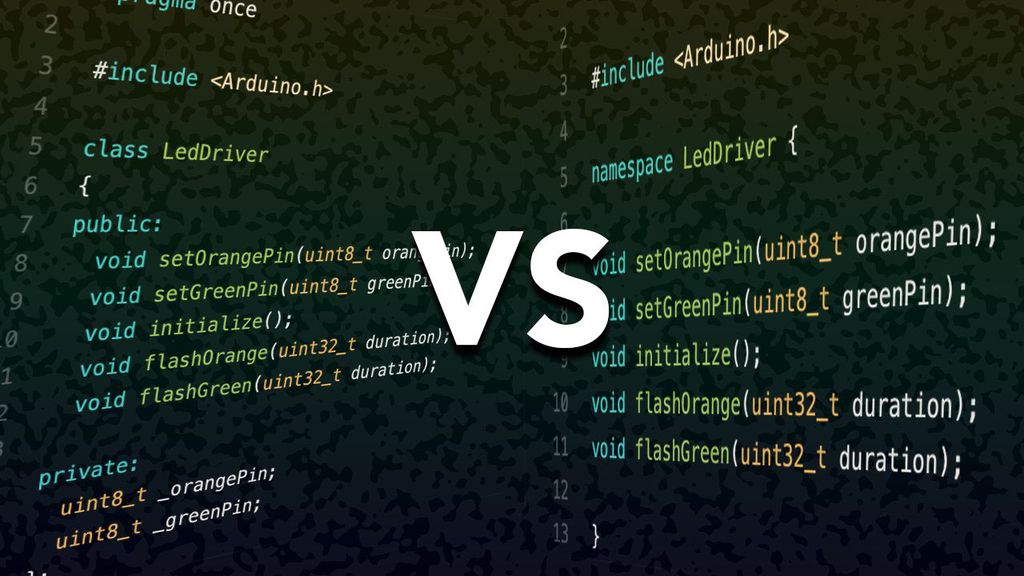
Should you use a class or a module with a namespace for a singleton interface in your firmware? I found there are many misunderstandings which lead beginners to make a wrong decision in this matter. With this article, I try to visualize these misunderstandings with simple example code for the Arduino platform.
Before we start, as with all of these topics, there is no simple rule, and there are a lot of exceptions. In the end, it heavily depends on the compiler and architecture you use.
The Example Use Case
I like to write simple driver code for my firmware, which flashes two LEDs for a given duration. The used PINs for the LEDs shall be configurable. In my main loop, I will flash the two LEDs at different durations.
The use case is no real-world example, but it contains all elements of configuration, initialization and usage.
Using a Simple Class
For the first test case, I write a simple class, without constructor and all required methods for the use case.
LedDriver.hpp
#pragma once
#include<Arduino.h>classLedDriver{public:voidsetOrangePin(uint8_torangePin);voidsetGreenPin(uint8_tgreenPin);voidinitialize();voidflashOrange(uint32_tduration);voidflashGreen(uint32_tduration);private:uint8_t_orangePin;uint8_t_greenPin;};
The usage of this driver is straightforward. I create a new instance of this class LedDriver ledDriver; and call the methods on it to configure, initialize and use it.
Compiling this code for an Arduino Uno will get these results:
Sketch uses 1146 bytes (3%) of program storage space. Maximum is 32256 bytes.
Global variables use 15 bytes (0%) of dynamic memory, leaving 2033 bytes for local variables. Maximum is 2048 bytes.
Using a Module with a Namespace
As a second example, I write the same interface using a module with a namespace and the same functions. Also I move the instance variables as global variables into the implementation file.
There is no instance required to use this interface. Beside this small detail, there is no considerable difference.
Compiling this code for an Arduino Uno will get these results:
Sketch uses 1144 bytes (3%) of program storage space. Maximum is 32256 bytes.
Global variables use 15 bytes (0%) of dynamic memory, leaving 2033 bytes for local variables. Maximum is 2048 bytes.
It is an almost similar result. The firmware is two bytes smaller. These bytes are missing, because the global variables are not initialized.
Comparing the Generated Code
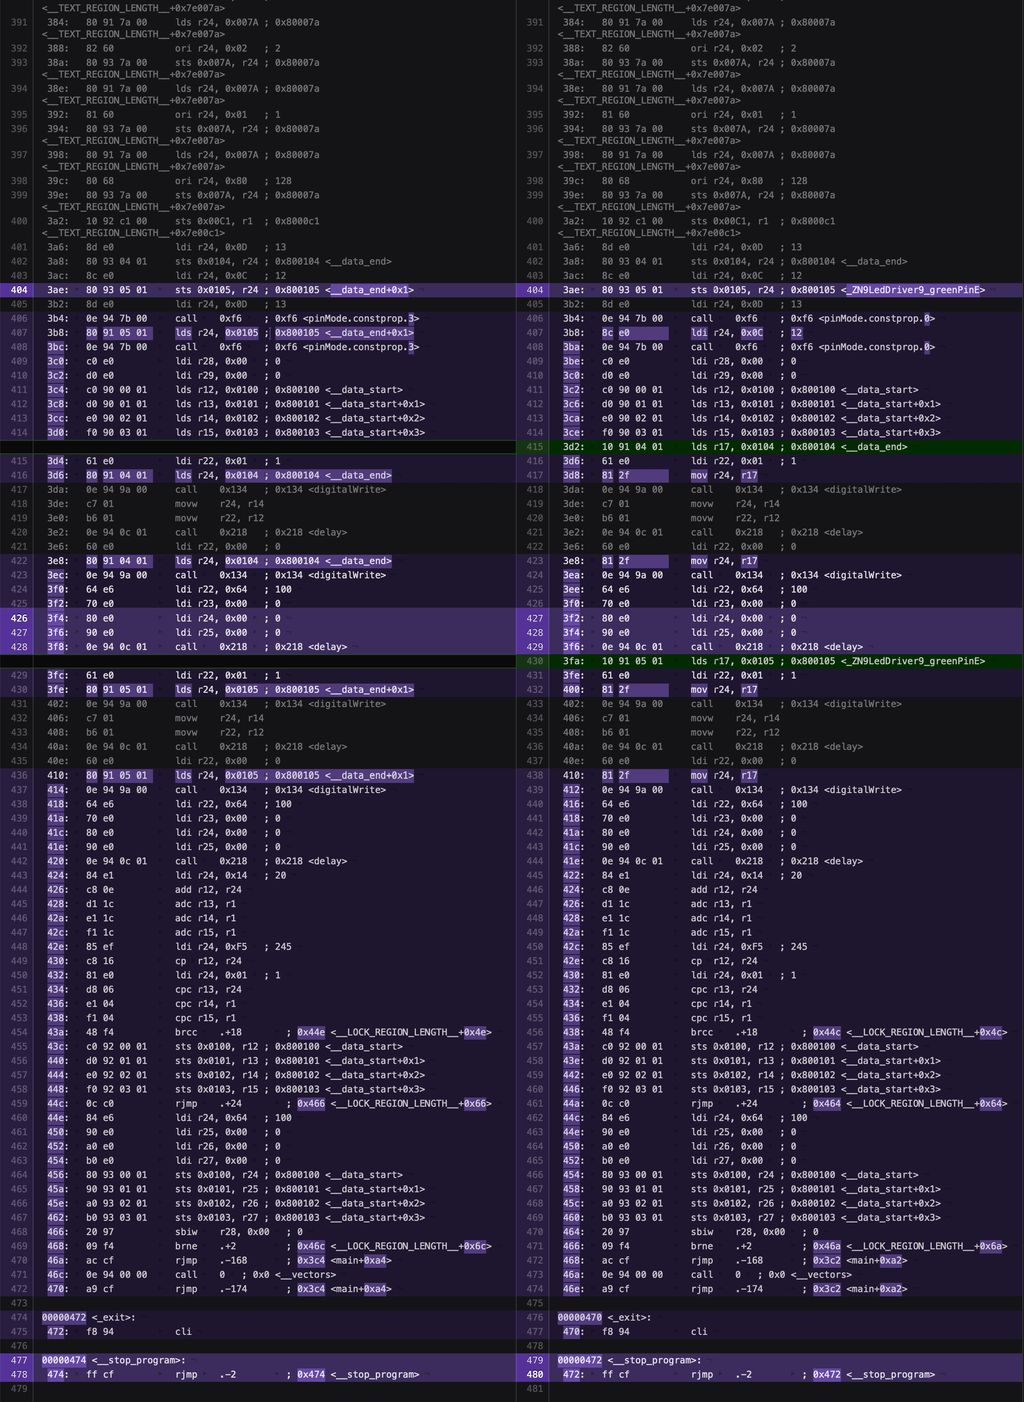
If we compare the generated code for the two examples, there is almost no difference. The optimizer of the compiler reduced everything to very similar code, as you can see in the disassembly below:
The generated code for the first example is on the left side and the code for the second example on the right side.
Most notable is the way, how the pin configuration is accessed: For the class-based interface, it looks like this:
lds r24, 0x0105 ; 0x800105 <__data_end+0x1>
The second implementation generated code, as shown below:
mov r24, r17
So, there is no Difference?
If you look at these examples, you may think it does not matter if you implement a singleton as a class or as a collection of functions in a namespace. In this perticular case, the optimizer did its best and reduced everything to almost identical machine code.
Let us compare the two implementations for a singleton interface for an embedded platform:
The Class
Pro: The instance variable is a user-defined name to access the interface.
Pro: Classes provide a higher level of abstraction.
Pro: There are no “hidden” global variables.
Con: It is not clear the class represents a singleton. A developer can create multiple instances accidentally.
Con: To access the interface, you need to add additional code to pass the instance variable to other modules.
Con: It usually produces larger firmware (explained later).
The Namespace
Pro: Is a singleton by definition and exists only once.
Pro: Can be used anywhere just by including the header file.
Pro: It usually produces the smallest firmware size.
Con: The global variables are “hidden” in the implementation.
Con: There is only one layer of abstraction.
Adding a Constructor to the Class
You may not have implemented the class as shown in the first example. Usually, a driver like this comes with a constructor where you can configure the instance.
LedDriver.hpp
#pragma once
#include<Arduino.h>classLedDriver{public:LedDriver(uint8_torangePin,uint8_tgreenPin);voidinitialize();voidflashOrange(uint32_tduration);voidflashGreen(uint32_tduration);private:uint8_t_orangePin;uint8_t_greenPin;};
This implementation looks smaller, with fewer functions to call. If we compile this example, we get the following results:
Sketch uses 1186 bytes (3%) of program storage space. Maximum is 32256 bytes.
Global variables use 15 bytes (0%) of dynamic memory, leaving 2033 bytes for local variables. Maximum is 2048 bytes.
Even this code seems smaller; it generates 44 bytes larger firmware. The reason is the constructor of the class. As soon as you introduce a custom constructor, the compiler will generate additional instructions to construct an object and also creates a function table.
The additional code can not easily be optimized away. Therefore the firmware size grows, without any additional benefits.
Size Comparison
Namespace
Class, no ctor
Class + ctor
Code Size
1144
1146
1186
Used Ram
15
15
15
Runtime Behaviour
Until now, I just discussed the impact of the different implementations on the size of the firmware. Another topic is the runtime behaviour of the function calls.
All three implementations will have the same runtime behaviour, as long as there is only one instance of the class in the firmware. The optimizer will detect this case and precalculate all variable references, like this->_greenPin, using absolute addresses.
As soon as you introduce multiple instances of a class, there may be an additional cost for each call. In this case, the instance location is put to the stack* prior the actual call, which takes extra time. Also, the indirect memory access is slower in this case.
*=Most likely put into a register for optimized code.
Bad Code (Code with Potential)
There are some situations where you should rethink your current implementation and consider an alternative.
If you see a regular class with no instance variables, you should analyze why this construct exists as class at all. Each instance of this class will be equal unless you are using the pointer to class instances as data.
It is usually some driver interface, and all method implementations access hardware registers or other global variables.
Something like this would make sense in a class hierarchy, as an interface or abstract base class, but not on its own.
In this case, the class is used as a namespace. It makes no sense to create an instance of a class like this. You should convert this into a module using a namespace like this:
namespaceFoo{voidmethodA();voidmethodB();}
The private variable _value is moved to the implementation file as a global variable in the Foo namespace.
The code above could be from a C developer, which did never made the transition to object-oriented languages. You should rewrite this code into a class like this:
If you are working with really tight size constraints (e.g. ATtiny22), you should (e.g. ATtiny22), you should favour the procedural approach using namespaces and modules. It provides good isolation of your implementation and one level of abstraction, which is enough for most cases in embedded code. The optimizer of the compiler will see less complexity and will most likely produce the smallest machine code possible. the procedural approach using namespaces and modules. It provides good isolation of your implementation and one level of abstraction, which is enough for most cases in embedded code. The optimizer of the compiler will see less complexity and will most likely produce the smallest machine code possible.
If you have no or little size constraints, you should , you should consider the advantages and disadvantages of both solutions. Only because you are using an object-oriented language like C++ to write a firmware, does . Only because you are using an object-oriented language like C++ to write a firmware, does not mean you you have to use a class as a module in any case. a class as a module in any case. Especially embedded software uses many interfaces where only one single instance can exist - because it is bound to a specific hardware peripheral. Using a couple of functions in a namespace will reduce the complexity of the code and provides enough abstraction for most cases. Also, there is no considerable difference if the global variables are defined in the implementation itself, or somewhere else as the single instance of the interface.Especially embedded software uses many interfaces where only one single instance can exist - because it is bound to a specific hardware peripheral. Using a couple of functions in a namespace will reduce the complexity of the code and provides enough abstraction for most cases. Also, there is no considerable difference if the global variables are defined in the implementation itself, or somewhere else as the single instance of the interface.
If you are writing desktop software, where you have no size and speed constraints, you should prefer a class before a flat procedural interface. In this case, you should also follow common patterns for singletons and implement guards to protect the developer from creating multiple instances. Also, you should implement an interface to make this singleton accessible from the right places in your code. a class before a flat procedural interface. In this case, you should also follow common patterns for singletons and implement guards to protect the developer from creating multiple instances. Also, you should implement an interface to make this singleton accessible from the right places in your code.
If you have questions, miss some information or have any feedback, feel free to add a comment below.
I walk you through the Snowflake v1.2 firmware's button-based configuration: short vs long presses, auto and single modes, LED indicators, and pattern durations. I explain the six-second timeout and that settings aren't saved after power loss—please read the full post for step-by-step usage and tips.
I tested SeeedStudio's Fusion PCB service for a new prototype and ordered five blue, 2-layer FR‑4 boards with lead‑free HASL. Delivery took about 10 days and the boards showed good quality for the price. Read on for details about ordering, solder mask, and tolerances.
I received prototype boards from Eurocircuits and was impressed by their outstanding build quality—sharp solder-mask edges, precise alignment, and a subtle shine on the traces. I share close-up photos and brief thoughts about vias and finishes; read on if you appreciate careful PCB craftsmanship.
I designed a simple three-part 3D printed enclosure for the Adafruit PowerBoost 1000C and up to a 1200mAh LiPo. In this post I share the print files, component list, and step-by-step assembly tips to convert the board into a safe portable power pack — please read on if you'd like to build one.
I designed a modular 19th‑century‑style lantern you can 3D print as a candlelight or expand into an LED street‑lamp stand. Read on for my glue‑free assembly, colour‑layer printing tips, and stand options — or jump to the Printables page for downloads and print instructions.
Posted on 2019-07-08— C++, Improve your Code, Learn
I guide you through evolving a simple Arduino blink example into a reusable event system. In Part 2 I cover function-pointer events, an EventLoop module, and practical multi-event examples. If you want cleaner, non-blocking firmware structure, read the full post for code and explanations.