published: July 8, 2019 —
last modified: October 23, 2025
In the first part of this series, we explored the general concept of event-based firmware. To read that article, follow this link.
The concepts we discussed were directly tailored to one specific firmware. Now, let’s develop those concepts further to build an event system that can be integrated into many different applications.
First, the variable gBlinkLedEvent is tied directly to this single event and cannot be reused by other events.
Second, the if (gBlinkLedEvent.isReady(currentTime)) { ... } code is repeated for all events. Repetitive code typically indicates a bad design. While there are very few cases where repetitive code is acceptable, in most cases it should be removed using structures, loops and tables.
Backtrack for a New Direction
Let’s first address the issue of the fixed function call. To solve it, we need to backtrack and set a new direction. The following example consists of the files blink9.ino, Event.hpp and Event.cpp:
#pragma once
#include<Arduino.h>classEvent{public:typedefvoid(*Function)();public:Event();Event(Functioncall,uint32_tnext);Event(constEvent&)=default;Event&operator=(constEvent&)=default;public:boolisValid()const;boolisReady(uint32_tcurrentTime)const;FunctiongetCall()const;voidclear();private:Function_call;uint32_t_next;};
The default constructor Event() creates an invalid event. The second constructor Event(Function call, uint32_t next) will create a valid event that will call the given function at the specified time point next.
To declare the class assignable and copyable, I included the copy constructor Event(const Event&) and the assign operator Event& operator=(const Event&). The statement = default will instruct the compiler to generate the default implementation for these functions. Another way to do this would be to simply omit these two lines to obtain the same result. However, adding them will help everyone know that the class supports copy and assign.
Next, I define the functions used to manage the event:
The function isValid() tests whether the event is valid. In this case, the event has a function to call. To test whether the function is ready to be called, we can use the function isReady(), which we have used in the past.
A simple getter getCall() lets us access the function to call, and the method clear() will cause the event to be invalid by assigning nullptr to the _call variable.
A Short Introduction to Function Pointers
If you already have experience using function pointers, feel free to skip this section.
Function pointers provide a low-level method to create dynamic calls, and it is likely that you have indirectly used something similar. The interrupt vector functions as an array of function pointers, or for some MCUs, the start address of the firmware is written at a defined location into the flash ROM.
In our example, I define a new type for a function pointer using the code shown below:
typedefvoid(*Function)();// ... or ...
usingFunction=void(*)();
This is a confusing, outdated syntax used to declare a function pointer type. If you decide to use function pointers for desktop applications in C++, you should instead use the header ⟨functional⟩ with the following syntax:
This declaration creates a new type Function, which defines a function pointer to functions with a specific syntax. In our case, it points to functions with no return value void and no parameter (). A function pointer using this type can only call functions with the given syntax.
The example shown above illustrates this principle. In the main() function, first the address of function a is assigned to the function pointer using the syntax &a. Therefore, the next statement gFunc() will call function a().
Next, the address of the function b is assigned to gFunc. Therefore, gFunc() located in the next line will call function b().
Creating Dynamic Events
Let’s now analyze how we use the new Event class in blink9.ino. At the beginning of the code, there is one event variable gEvent and two forward declarations of the event functions:
EventgEvent;voidledOnEvent();voidledOffEvent();
The forward declarations are required in order to use the function names in the code before their definitions.
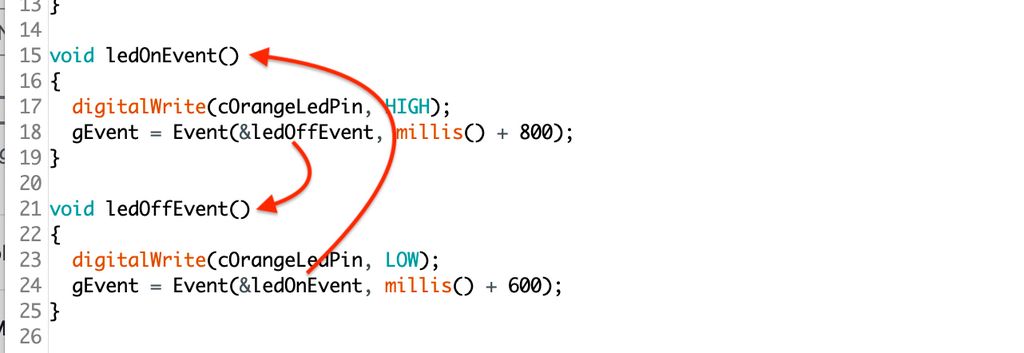
In the setup() function, the LED pin is configured as an output, and the first event ledOnEvent() is called manually.
Manually calling the first event function offers a smart method to set the output into a defined state and assign the first delayed event. Alternatively, I could also write the setup() function as follows:
As you can see, in this loop there is no mention of ledOnEvent() or ledOffEvent(). There is also no visible delay value in this loop. Essentially, you can use the same loop for any kind of event based code, which is a step in the right direction.
Issues in the Previous Example
The previous example adds some flexibility to our code by using function pointers to call the event function, but a number of issues remain:
There is a single event variable gEvent. Adding more events will bind the events to own event variables, which is certainly not optimal.
The code Event(&ledOnEvent, millis() + 600); uses the real time counter millis() directly instead of passing a single delay value. Not only is this code difficult to use, but you also have the risk of losing long-term precision of the event timing.
Encapsulate and Allowing Multiple Events
For multiple events, we need to use multiple event variables. To keep the assignment to these variables dynamic, we will use an array of events.
We start by creating a new compile unit with the files EventLoop.hpp and EventLoop.cpp. The interface of this compile unit contains all functions required to operate the new event system.
As shown in the previous examples, we do not use a class, but rather a collection of functions encapsulated in a namespace. There is one single event loop for the entire firmware, meaning a class would only add complexity to the implementation.
EventLoop.hpp
#pragma once
#include"Event.hpp"namespaceEventLoop{typedefvoid(*Function)();voidinitialize();voidaddDelayedEvent(Functioncall,uint32_tdelay);voidloop();}
The function initialize() must be called from the setup() function to initialize the event system. Adding new events should remain as simple as possible by using the addDelayedEvent() function. Now, we simply need the function pointer and the delay, and we no longer require any calculation. Finally, the function loop() will process the events from the loop of the firmware. You now need to call EventLoop::loop() from the loop() function of the firmware, and we will demonstrate this shortly.
The example below shows an ineffective implementation to illustrate the basic concept of our new event system.
Here, the constant cEventStackSize defines the maximum number of “parallel” events for our system. The value of 8 means that there can be eight pending events waiting to be executed. Any additional events will be ignored and will likely result in undefined behaviour.
It is normally very easy to find the maximum number of pending events for a firmware. This differs from a desktop application, where every slight movement of a mouse will add 100+ events to the stack. Instead, each new event is added by a previous event or some other defined action.
The variable gCurrentTime will serve to store the real time counter value for the current event that is processing. It may be slightly tricky to understand why this variable is used for our simple example, but it helps to improve the timing quality of the system.
If at a given time multiple functions are called from events, and these calls last more than one millisecond, utilizing millis() + delay would cause a slight shift in the timing. The variable gCurrentTime always stores the point of time at the beginning when processing the events. This reduces (but does not completely solve) these problems.
Towards the end, we find the actual array or stack of events. The variables are automatically initialized with the default constructor of the Event class and, therefore, are all invalid events.
voidinitialize(){gCurrentTime=millis();}
The initialize() function simply sets the initial value of gCurrentTime for cases when the firmware is adding events with the setup() function.
This example uses a very simple implementation to add an event to the array. In the function addEvent(), the for loop searches for the first free “slot” and stores the event. This is neither effective nor a smart practice, but it is easy to understand.
Adding a delayed event using addDelayedEvent constructs a new Event object and adds it to the array using addEvent(). The delay is calculated by adding gCurrentTime and the passed delay parameter.
The key to the system is the loop() function. Here I will assume it is called indefinitely from the main loop() function. It first stores the current real time counter value from millis() , then compares it to the last stored time in gCurrentTime.
If there is indeed a difference, the new time is stored in gCurrentTime and all events are processed by calling the processEvents() function.
This implementation will only process events every millisecond, and it will always wait for the next tick of the clock (real time counter). If the loop is delayed for any reason, the events will be processed immediately if there was a change of the clock.
Processing the events in processEvents() is similar to what we demonstrated in the previous example, and in this case, we process every event in the array. But this implementation is ineffective, and the order of events is not sequential, but it is at least very simple and easy to understand.
Using the New Event System
Let’s now test the new event system EventLoop by attempting to blink two LEDs at different speeds:
The code begins with the constants and forward declarations. In the setup() function, I first configure the two outputs for the LEDs, then initialize the event system using the EventLoop::initialize() call. This must be done before any addDelayedEvent() function is called.
Next, we will manually call two of the event functions to set the state of the output and add the initial event.
Next, we look at the three event functions we have already seen in previous examples. The only difference here is that these functions call EventLoop::addDelayedEvent() to add a new event.
At the end of the code, you can see the nearly empty loop() function, which is simply calling EventLoop::loop().
Observations
This new example code is very clean and easy to read.
All implementation details of the event system are hidden behind the EventLoop interface. interface.
The loop() function is a simple one-liner. function is a simple one-liner.
Remaining Issues to Fix
Currently, there is only one type of event, the delayed event. In most firmwares, users can have something like an event. In most firmwares, users can have something like an interval or or polling event as well. event as well.
Adding and processing of events is not very effective with the current implementation. The array should be managed as a stack, adding new events at the end and removing processed events from any position.
This will also solve the issue we encountered related to the order of processing. Events that are added at a later point in time should also be processed later. If multiple events are to be executed at the same time, they should always be processed in the order in which they were added.
Interrupts should be able to act as the source of events in a safe way.
Example Files
You can find all the examples in the following GitHub repository:
In the second part of this series, hopefully you were able to better understand the basic concepts of event-based firmware. Now, you can apply this knowledge to your next project.
All the examples we demonstrated here are as minimalistic and simple as possible, but for real applications you can write better interfaces and add more functionality to your code. As you continue to develop and understand the concept, this should come with ease.
If you have any questions, missing some information, or simply wish to provide feedback, feel free to comment below!
I present a stylised logic-gate puzzle: a circuit that performs a handy function. Try to deduce what it does from the diagram, use the hints if you get stuck, and read the full post for the solution and explanation. I'd love your feedback or questions.
I’ve published a simple firmware example for the Always-On project, built for PlatformIO and Visual Studio Code with my HAL adapted for Adafruit Feather M0. It explains the hardware mapping, motion-triggered lighting behavior, and timing options. Please read the full post for setup instructions and the GitHub link.
I've released Lucky World, a compact jump'n'run for the MeggyJr RGB featuring an intro, 16+ levels, secrets and an end scene. I squeezed it into ATmega328P limits and shared the sources under GPLv2. If you're curious, please read on for downloads, requirements, and play instructions.
Posted on 2023-01-29— 3D Printing, Build, Projects
I tested three inexpensive, easy methods to add LED lighting to my modular 3D‑printed lantern using USB power: reused LED modules, short 5V strips, and WS2812B RGB with a microcontroller. I share parts lists, soldering tips, diffuser advice, and firmware steps—read on for step‑by‑step instructions and printable models.
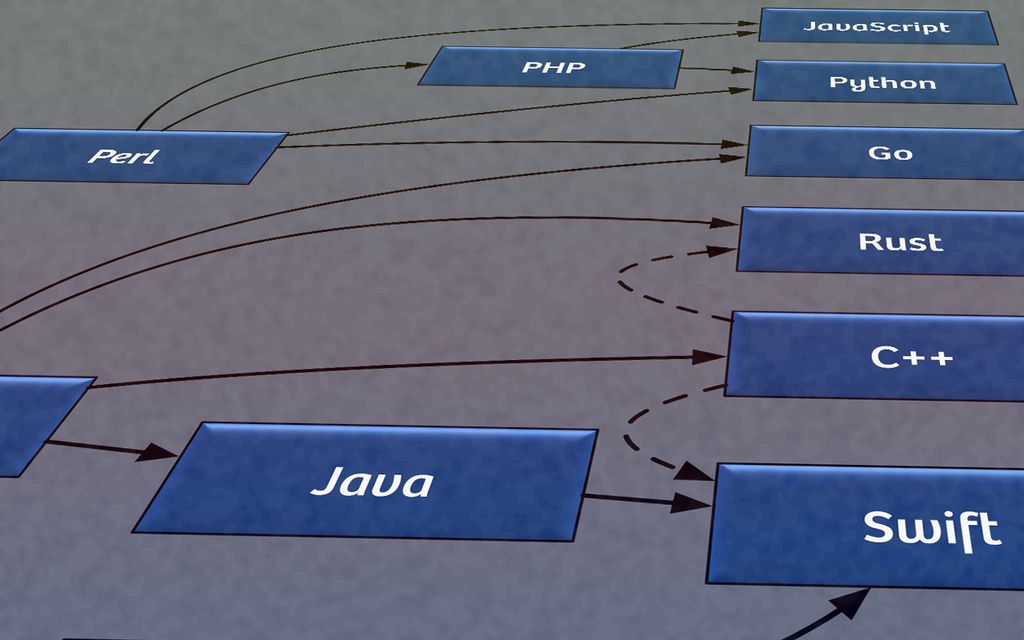
I've been developing software for over 20 years and share how my language preferences shifted—from assembler and C to Python, Swift, C++, Go and Rust. I outline use-cases and trade-offs in a personal, practical way; if you're deciding what to learn, please read the full post for detailed guidance.
Posted on 2019-08-01— C++, Improve your Code, Learn
I walk through practical techniques I use to make firmware error handling clearer and more consistent in modern C++. From enum classes and a shared SimpleStatus to StatusResult templates and helpers like isSuccessful, I present readable patterns and code examples you can adopt. Read the full post for details and examples.